
 Data Recovery Software
 Hard Drive Data Recovery
 SSD Data Recovery
 Deleted File Recovery
 Pen Drive Gone Blank
 Memory Card Not Opening
 External Hard Disk
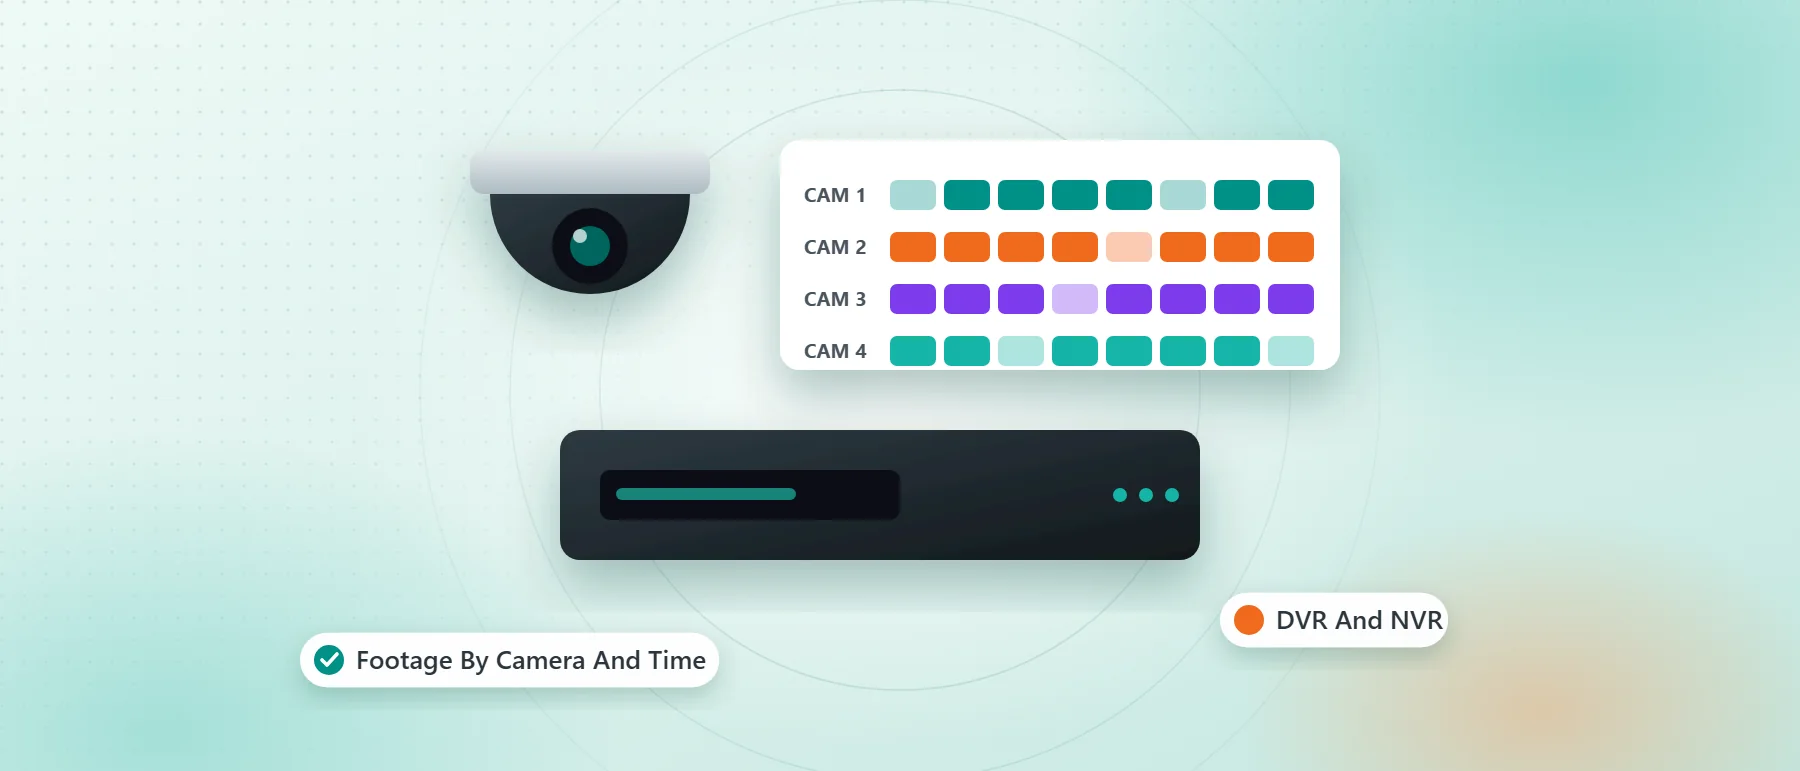
CCTV Data Recovery: A Complete Guide To DVR And NVR Footage
Something happened in front of a camera and now you need the recording. The recorder has failed, the footage is missing from its playback screen or someone reset it. Or the disk was taken out and plugged into a PC and Windows only offers to format it. This is when footage is often lost for good, by accident rather than by the original fault.
The good news is that a DVR or NVR rarely wipes its recordings straight away. The video stays on the disk until the recorder writes new video over it. If you stop the recorder in time and handle the disk carefully, there is a real chance the footage is still there.
This guide explains how recorders store footage, why Windows cannot read their disks, what to do first and how to recover the recordings with DRE Pro, the Windows software from DataRecoverix, by camera, date and time.
How DVRs And NVRs Store Footage
A DVR records analogue cameras and an NVR records IP cameras, but both write video around the clock, as fast as the cameras send it. To do that, most recorders format the disk their own way instead of using a normal file system.
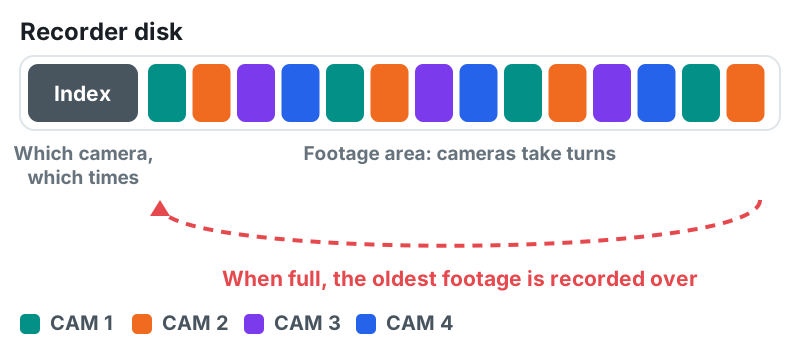
A recorder disk usually has two parts. One part is an index: a record of which camera recorded which piece of the disk and between which times. The other part is the footage area, where the video itself is written in large blocks or clusters, with the cameras taking turns. The index is small and changes all the time. The footage area is huge and is written in order, from start to end.
When the disk is full, the recorder does not stop. It goes back to its oldest footage and records over it. This is the overwrite cycle. A disk that holds two weeks of video always holds roughly the last two weeks and every hour of new recording destroys about an hour of the oldest footage.
Why Windows Cannot Open A Recorder Disk
Windows reads file systems such as NTFS, FAT32 and exFAT. A recorder disk holds none of these or holds a layout Windows does not understand. So Windows shows the disk as unformatted or RAW or asks to initialise it and offers to format it for you.
Do not accept. Formatting or initialising writes a new, empty layout over the start of the disk, which is often where the recorder's own index lives. The footage may survive that, but the index that named each camera and time may not. Click Cancel every time Windows asks.
First Steps: Stop The Recorder And Protect The Disk
What you do in the first minutes matters more than any software. The aim is simple: nothing more is written to the disk.
- Stop recording. If the footage you need is old, every minute the recorder keeps running brings the overwrite cycle closer to it. Power the recorder down properly.
- Do not format, initialise or repair the disk in the recorder. On some recorders, initialising writes a new, empty index and the recorder then records over the old footage.
- Do not reset the recorder to factory settings in the hope that it will find the footage again.
- Take the disk out. Note which bay it came from if the recorder holds several disks.
- Connect the disk to a Windows PC by SATA or a USB adapter and cancel any offer to format or initialise it.
- Read only from the disk. Save nothing to it and save recovered footage to a different drive.
Check The Disk And Image It First If It Is Weak
Recorder disks spin day and night, often in a hot cabinet and many fail from wear. A weak disk may click, read slowly or drop off the PC and each long scan adds more wear.
DRE Pro's Drive Check runs a Quick, Standard or Advanced test, a read sample of about 1, 2 or 5 minutes spread across the disk. It reads the disk's own S.M.A.R.T. health report where the disk provides one, counts failed and slow reads and gives a plain verdict: fine to scan, image first or consult a specialist. It never writes to the disk and it stops if reads keep failing. It is a sample, not a full surface scan, so a clean result is not a promise that there are no bad sectors.
If the disk is weak, make a disk image first. Create Disk Image copies every sector of the disk to an image file on another disk. It reads the healthy areas first and comes back to bad areas later, so a weak disk gives up what it can quickly. Sectors that cannot be read are left as zeros and marked in the image's map. Then you scan the image, as many times as you need and the original disk can rest.
The CCTV Recovery page also offers to make a disk image first if many of its sample reads fail.
How DRE Pro Reads A Recorder Disk
DRE Pro has a CCTV Recovery page for recorder disks. Before anything is scanned, it takes a first look: it reads the partition table, identifies each file system, looks for the marks Hikvision and Dahua recorders write into their disks and reads 64 samples spread across the disk for video. In a few seconds it tells you what the disk holds and which scan suits it. The recorder's disk is only ever read and recordings cannot be saved back onto it.
On a Dahua disk, DRE Pro reads the recorder's own file system, DHFS, like any other file system. Explore and Quick Scan list every recording it holds as channel, day, then start and end time, while the disk is read, without searching every sector. Each rebuilt recording is checked against the key-frame index at its start.
On a Hikvision disk, DRE Pro reads the recorder's own index, HIKBTREE, which says which camera and stream each 1 GB block of the disk holds and the times it covers. It also reads the recorder's record database, which lists every recording with its camera, start and end. Explore and Quick Scan list the recordings from it. Hikvision video does not say which camera recorded it, so the camera comes from the index, never from a guess.
For footage the recorder no longer lists, Deep Scan reads every sector and follows CCTV footage byte by byte in the same pass. What it finds is listed under Lost Footage. It also finds raw H.264 and H.265 streams, MPEG-TS and MP4, which many recorders and IP cameras write.
When DRE Pro recognises neither a file system nor a recorder format, it offers Generate Diagnostic Report, Start RAW Recovery or Cancel. You read the report before saving it and it holds no serial numbers, paths, volume labels or licence details.
Finding Footage By Camera, Date And Time
A recorder disk can hold thousands of recordings, so finding the right one matters. DRE Pro groups recordings by camera, day and session where the recording itself or the recorder's index gives them. Main-stream and sub-stream recordings are listed apart, so the lower-resolution copy many recorders keep is not mistaken for the main one.
Times are shown on the recorder's clock as it was set, never converted. That is important. If the recorder's clock was ten minutes fast, the recordings are ten minutes fast too. Before you search, find out how the recorder's clock compared with the real time. If the recorder still works, a photo of its time display next to a phone clock is a simple record.
A recording with no camera or time in it is listed under Unknown rather than given one that looks right. Partial recordings, loose fragments and duplicate copies get their own groups, Corrupted Or Partial, Unclassified Fragments and Duplicate Copies, so the whole recordings are easy to find.
Playing The Recordings
Windows cannot play many recorder files, such as Dahua .dav or bare H.265 streams. DRE Pro plays .dav files and other recordings Windows cannot play in its own player, without converting or changing the file. Play a recording before you save it, to check that it is the right camera and the right moment.
When you save, each recording is written to a folder on another drive, exactly as the recorder wrote it. On a Hikvision disk, each recording is saved under its channel and the day it starts, named by the times the recorder gave it.
Common Problems And What To Expect
Overwritten footage. If the recorder has recorded over the time you need, that footage is gone. No software can recover it, because the old video was physically replaced. This is why stopping the recorder quickly is the most important step.
A recorder that was reset or initialised. On a Hikvision recorder, initialising writes a new, empty index, so the old recordings are no longer listed. Their video stays in the blocks until the recorder records over it and Deep Scan can find it by its contents. It is listed under Lost Footage without its camera, because the index that named the camera is gone. This has not yet been tried on a real initialised disk.
Partial footage. Older footage found by Deep Scan often comes back in pieces, because the recorder has already recorded over parts of it. On a Dahua disk, DRE Pro joins pieces only where the frames really carry on, never across a stretch that was recorded over and never across days. On a Hikvision disk, each piece starts at a key frame so it plays. What was recorded over between the pieces is gone.
A disk that says abnormal or exception. A recorder that reports its disk this way has stopped trusting what it reads. The footage is often still on the disk. Take the disk out and read it on a PC instead of letting the recorder try to fix it.
When The Footage Is Evidence
If the recording may be used by the police, an insurer or a court, how you handle the disk matters as much as what you recover. Keep simple notes from the start: who removed the disk, when, from which recorder and bay and where it has been since. Note the recorder's make, model and clock offset and label the disk.
DRE Pro's forensic tools help with the technical side. Create Disk Image can write an E01 evidence image with the case number, evidence number, examiner and notes inside and stores the MD5 and SHA-1 of the data in the file. Hash And Verify works out MD5, SHA-1, SHA-256 and SHA-512 of a drive, an image or the disk inside an image and compares them with a value you were given. The Write Blocker makes a drive read-only to every program on the PC until the block is removed.
The Write Blocker is a software blocker, not a hardware one. An administrator can remove it and the moment a drive is plugged in, before it is blocked, is not covered. For evidence that may go to court, use a hardware write blocker as well, as DRE Pro's own screen says. Then scan the image, never the original and save what you find to a third disk.
Mistakes To Avoid
- Letting the recorder keep recording while you work out what to do.
- Formatting or initialising the disk, in the recorder or in Windows.
- Running scan after scan on a disk that clicks or disconnects, instead of imaging it once.
- Saving recovered footage back onto the recorder's disk.
- Putting the disk back in the recorder before the footage is safely copied and checked.
- Trusting the recorded times without checking how the recorder's clock compared with the real time.
A Practical Workflow, Step By Step
- Power the recorder down as soon as you know footage is needed, so nothing more is recorded over.
- Write down the recorder's make, model, clock offset and the time window you need.
- Take the disk out and connect it to a Windows PC by SATA or a USB adapter. Cancel any offer to format or initialise it.
- Run DRE Pro as administrator. Run Drive Check from Disk Tools and read the verdict.
- If the disk is weak, use Create Disk Image to copy it to an image on another disk, then work from the image.
- Open CCTV Recovery, choose the disk or the image and read the first look: file systems, recorder format and the video found.
- Run Explore or Quick Scan to list the recordings the recorder still holds, by camera and day.
- Run Deep Scan for older footage the recorder no longer lists and check the Lost Footage group.
- Play the recordings for your camera and time window, tick the ones you need and save them to a different drive.
- Play the saved copies once more before the original disk goes anywhere near the recorder.
Can Deleted CCTV Footage Be Recovered?
Often, if it has not been recorded over. Recorders record over their oldest footage in a loop, so stop the recorder or remove the disk as soon as you can. Footage that has been recorded over cannot be recovered by any tool.
Windows Says The DVR Disk Needs Formatting. Should I Format It?
No. The recorder wrote its own format, which Windows does not read. Formatting would make recovery harder. Cancel, then open the disk in DRE Pro.
Does DRE Pro Know Which Camera A Recording Came From?
Yes, where the disk says so. Dahua frames carry their channel and time and on a Hikvision disk the camera is read from the recorder's own index. Footage that no index entry claims is listed without a camera rather than with a wrong one.
Which Edition Do I Need For CCTV Recovery?
Scanning, the first look and previews are free, so you can see the recordings before you buy. The CCTV Recovery page and saving CCTV recordings come with the Enterprise edition. Scanning a disk image needs Professional or Enterprise.